Step by Step Guide: Host your own website.

In this technical era, everyone has at least once in their life thought about creating a website and showcasing it to the world. Is it your pet project? A business idea you want to test? Or just a skill you you want to acquire for future use? A lot of non technical people use Wordpress, Wix or other providers to host their content, but if you need your own domain, you would have to pay for it.
Below is the step by step guide of how we hosted our website from scratch.
Let’s start.
Get a domain
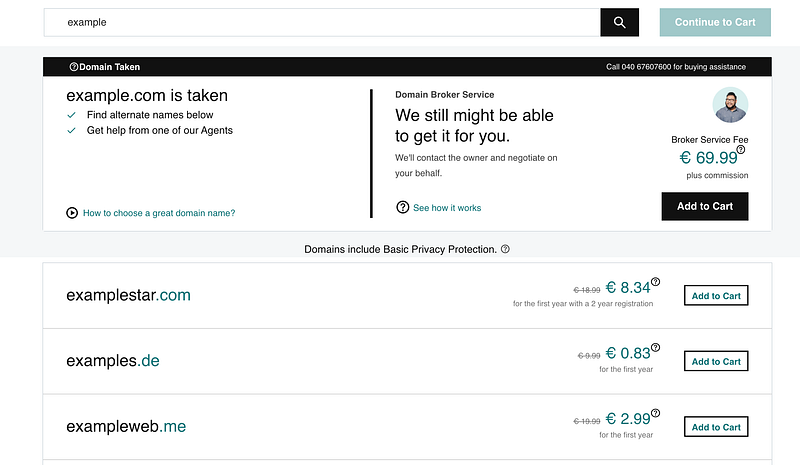
First step is to buy a domain from a domain registrar. Domain registrar are basically middlemen that manages the domain name registration process with the respective registries like .com, .in, .ca etc. This is also a place where you can check the possible domains available and do the cost vs name analysis as shown in the image below. The domain registrar we used is Godaddy.com. You can find more information here about how to buy a domain.
Get a server to host the application/ website.
Now that we have defined how people are going to reach us, we need to find a host where that specific domain should be pointed to. A host can be any machine connected to internet that runs your application/ hosts your content. However it is a full time effort to ensure 24/7 availability, if you’re running this machine yourself. This is where cloud services come into place. A cloud server is basically a computer that runs somewhere on the internet, but some one else is taking the responsibility ensure 24/7 availability.
There are several cloud service platforms available.
Heroku: A developer friendly web hosting platform, which offers you a ready-to-use environment that allows you to deploy your code fast and is initially free of cost. But might ask you to pay when you start using additional addons like TLS certificate setup, databases etc. Nevertheless a good option if you just want to totally outsource the deployment and operations of your project. However when you scale, there is a high probability that you would want to move to other hosting platforms because of increasing costs.
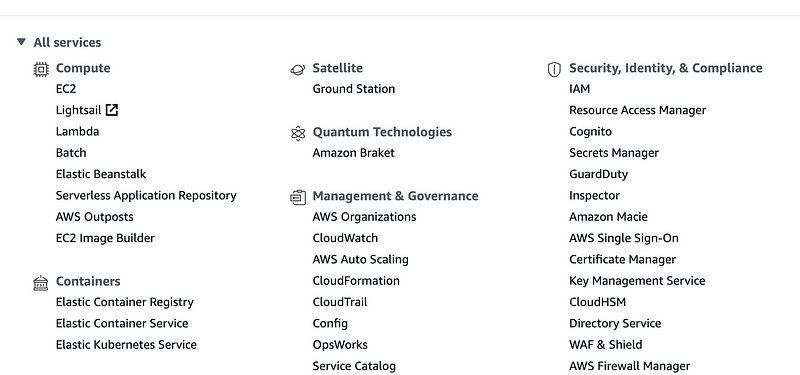
AWS: Even though the deployment process is a bit complicated than heroku, it is everyone’s best friend so far. It was the first major Infrastructure as a service (IaaS) provider and holds the biggest market share. AWS will provide instances and services for you to manage. There are free EC2 microservers available with an option to scale on demand if you want to test your application.
Azure: A new guy(pretty old now) in town, that comes from Microsoft, however doesn’t have option of free microservers. It caters better for larger organizations already committed to Microsoft products moving an existing infrastructure to the cloud.
Since we didn’t want to pay money to heroku for setting up TLS certificates for our website, we moved to AWS. One can create an account and get a free EC2 server for one year.
After getting the servers, one needs to change the default security settings to open http ports 8080 (for http) and 443 (for https). More info here.

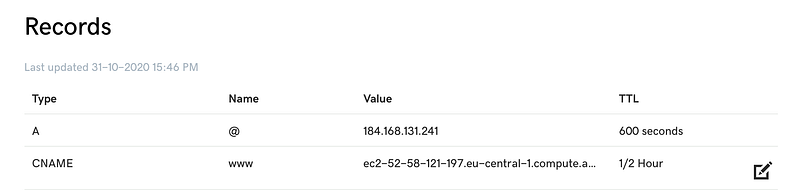
Once you have your EC2 Instance running, it is time to point your domain name to your host. Copy the Public DNS value of your EC2 Instance and add a DNS entry for type: CNAME, name: www in your domain name provider. In godaddy.com, the values would look like below. More information here.
Setup TLS Certificate
On web, it is important that your website has a TLS certificate for 2 reasons:
1. Encrypt information sent over internet.
2. Provide identity assurance, both of which help online consumers to positively identify and trust websites that are safe to transact with.
One can get free TLS certificate using Non Profit Certificate Authority(CA) Let’s Encrypt. The instructions for getting certificate can be found here.
We used certbot, an open source command line ACME client for the process of receiving certificate, as mentioned in the article. One you pass the ACME challenge to verify you are the owner of the domain, you will get 2 files with keys: fullkey.pem and privkey.pem. Make sure to use these files for ssl_certificate on your api gateway as described in the next step.
Setup Api Gateway
API Gateway is used for following concerns:
1. Separate out cross cutting concerns e.g. authentication, ssl termination, DDOS protection/ throttling from the actual services.
2. Routing the api requests to a specific application in case you have multiple components running that are responsible for a specific function. (Microservices based architecture).
Nginx is a great open source software that is lightweight, performant, easy to setup and provides the functionality of API Gateway and Load Balancing (in case you have multiple servers running your application). You can use docker to run nginx on your host using the instructions here. Note that docker is used just to containerise(recommended) your nginx application, you can also install nginx on your host manually using the steps here.
The nginx.conf file needs to be updated with the ssl certificate lines as described below.
Note that the cert files referred in directive ssl_certificate and ssl_certificate_key were generated in the previous steps and should exist / copied over to the host.
Start the application/ Add the content on the host.
The above configuration will look for an index file in /sites/default directory. One can change the root path to point to a separate directory where your content is placed. In case one has an application running on some port, say 8080, of the host, one can uncomment the last proxy_pass http://127.0.0.1:8080 directive and comment the previous lines in location directive. Pointing to a specific IP and Port is a very common practice when one is running in micro-services based or containerised architecture.
Now that you type your domain name in the browser, you should be able to get results content from your application.
Hope that above guide acted as a helpful first step. Happy Hosting!