How I brought my dead computer back to life.

I have a great relationship with the New Year. I am not much of a planner, but nature has its way of planning a bumpy ride for me for the first few days of every year.
On my second day at work as the year started, my computer refused to start. And since it was an Arch Linux OS, and boot debug logs were disabled, it won't tell me WHY.
To give you a bit of context, I was not surprised. As I am not much of a planner, on the previous evening (Monday), I had decided to resize the Logical Volumes of my main partition. I have disc encryption enabled on my partition. So I was a bit worried that bootloader is not able to decrypt the partition properly. But luckily I had only resized the logical volumes and not the whole partition. This is what I did to fix my broken boot-loader.
Getting the visibility on the culprit.
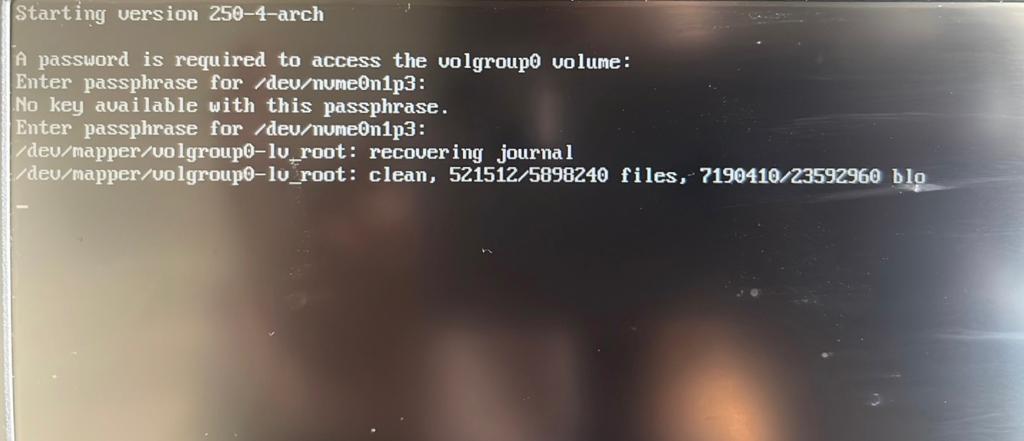
The next step was to get some eyes on what was going on during the boot. This is what my boot-loader looked like I had been staring at it to move forward.

As they say,
All things come to those who wait.
I would have believed that quote, if it was a weekend and I had all the day to wait. But right then, staring at the boot screen which seemed to be stuck for forever, wasn't helping me much.
That's when I changed the boot-loader script to enable the debug logging.
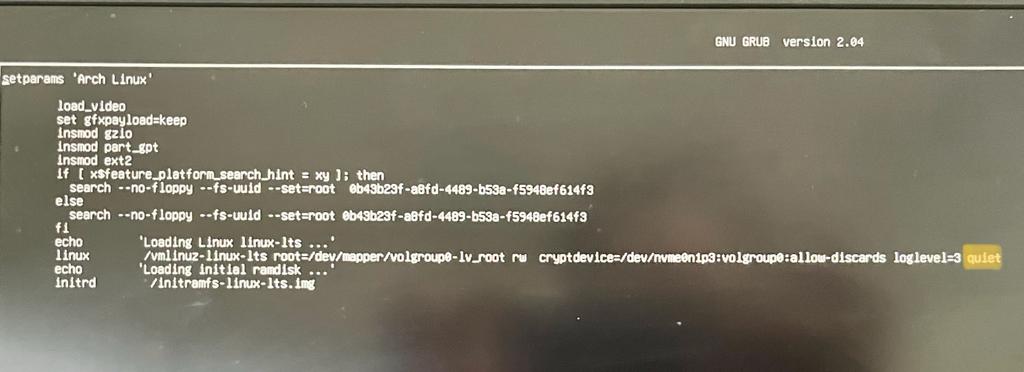
How: On startup screen, where it asks to choose the OS to start with, pressing e takes one to the editor with GRUB boot-loader script, which is normally present in /boot/grub/grub.cfg in linux system.
I removed the quiet flag (highlighted in the image below) from the boot-loader script, re-initiated the boot again, and let nature take its course.

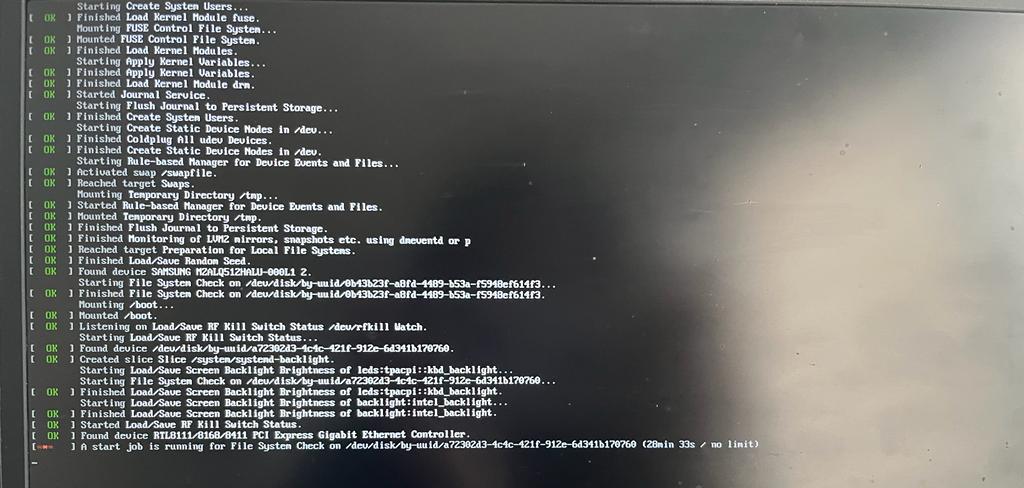
Now I could finally see the logs of what was happening.

Huh!!! From what it looks like, it seems like there is a start job for File System Check that seems to be taking forever to finish.
That made me wonder, how could I bypass this file system check during the boot. This would at-least enable me to access my File System, make necessary changes and hopefully fix the problem.
Skipping the blocking job during boot.
After a bit of googling, I added fsck.mode=skip flag into my boot-loader script. This would enable skipping the File System Checks during the boot. This was added in the same line, the quiet flag was removed in previous step. I initiated the boot again and waited for something to happen.
This time it took me into maintainers mode where I could finally access my device as root.
Righting the wrongs.
From what I could see, my /dev/mapper/volgroup0-lv_home volume was not mounted. Running File System Check for the volume also failed.
fsck /dev/mapper/volgroup0-lv_home
This definitely proved that there is something wrong with the home volume.
What went wrong: This has most probably happened, when the day before, I increased the size of the root logical volume and shrank the size of my home logical volume, referring this doc. I must have done some mistake in calculating the sizes of the resulting volumes. In my defense, it was already 10 p.m. at night when I did that.
I was in a bit of rush, as the next morning, I had to start for work again and it wouldn't help if I was still not able to fix my computer. Hence I ended up formatting my /dev/mapper/volgroup0-lv_home logical volume using the following command:
mkfs.ext4 /dev/volgroup0/lv_home
Running the File System Check on the new volume succeeded this time.
Then I mounted the newly created logical volume on the home directory using:
mount /dev/volgroup0/lv_home /home
One would think that this would be all, but there's still one step missing.
The UUID of the /dev/volgroup0/lv_home logical volume has changed because I had created a new File System. We need to tell the File System to check for new UUID during boot. Runnig blkid command gives the list of all the block devices in the machine with their UUIDs.

I had to copy over the UUID of /dev/mapper/volgroup0-lv_home volume and replace it with the UUID in /etc/fstab file for the given volume group.
Rebooting the machine.
HURRAY! This time rebooting the machine actually took me to the home login screen.
I had to however create a new user, as all the config files for the apps, which were present in the `/home` directory for my old user didn't exist anymore. But that was an OKish compromise. The good thing was that I didn't have to re-install all the packages as the root volume was still intact.